Chillies, with their vibrant colors and fiery flavors, are not only a delightful addition to various cuisines but also a rewarding plant to grow at home. Whether you're a professional gardener or just newbie, cultivating chillies from seed can be an amazing and relatively straightforward process. With the right techniqus and a bit of patience, you can enjoy a perfect harvest of these spicy delights right from your own garden or windowsill. Trendwizz.com will discuss about how to grow chillies at home from seed.
Choosing the Right Seeds:
Start by selecting high-quality chilli seeds from a reputable source. There are numerous varieties available, each with its own unique flavor profile and heat level. Consider factors such as the size of the plant, its preferred growing conditions, and the level of spiciness you desire. Popular varieties for home cultivation include Jalapeño, Thai Bird's Eye, Cayenne, and Habanero.

Germination:
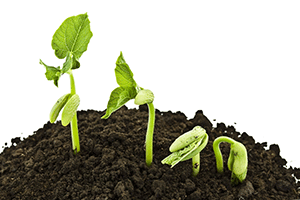
To kick-start the growing process, germinate the chilli seeds indoors. Use a well-draining seed-starting mix to fill tiny pots or seed trays. After sowing the seeds, lightly irrigate the soil to a depth of around quarter to half an inch. To produce a greenhouse effect that helps keep moisture and warmth, cover the pots or trays with plastic wrap or a clear lid. Place them in a warm location, ideally around 70-80°F (21-27°C), such as on top of a refrigerator or near a sunny window.
Provide Adequate Light:
After the seeds have sprouted (usually in a matter of one to two weeks), take off the plastic wrap and plant the seedlings in an area with plenty of light, preferably six to eight hours a day. To guarantee healthy growth, you can add a grow light as a supplement if natural sunlight is insufficient.
Watering and Feeding:
Chilli plants prefer slightly moist soil, so water them regularly, keeping the soil consistently damp but not waterlogged. Leave the soil to dry out slightly between watering to prevent root rot. Additionally, feed the plants with a balanced liquid fertilizer once they've developed a few sets of true leaves, following the manufacturer's instructions for dilution and frequency.
Transplanting:
The seedlings are ready to be moved into bigger containers or, if the weather permits, into the garden after they are 3–4 inches tall and have produced multiple sets of leaves. Pick planting containers or a spot with soil that drains properly and enough room for the plants to spread out.
Provide Support:
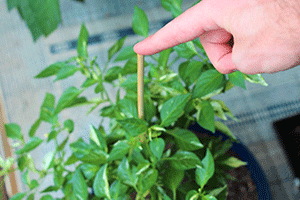
Because of the weight of the fruit, chilli plants may become top-heavy as they mature. Support the stems with cages or stakes to keep them from bending or breaking. Additionally, by improving air circulation around the plants, this will lower the chance of disease.

Pruning and Maintenance:
To promote bushier growth and more fruit production, pinch off any little shoots that appear between the main stem and branches on a regular basis. Additionally, remove any damaged or diseased leaves to prevent the spread of infections. Keep an eye out for pests such as aphids or whiteflies and treat them promptly if detected.
Harvesting:
Chillies can be harvested once they reach their mature color, whether it's green, red, yellow, or any other hue specific to the variety. Simply snip the chillies from the plant using clean scissors or pruning shears, taking care not to damage the stems or surrounding foliage. For continued harvest throughout the season, pick the chillies regularly as they ripen.
You can successfully grow chillies from seed at home and enjoy a consistent supply of fresh, flavorful peppers to spice up your culinary creations by following aforementioned steps. Keep in mind that gardening is a learning experience, so don't be afraid to try new things and adjust to your plants' needs.


