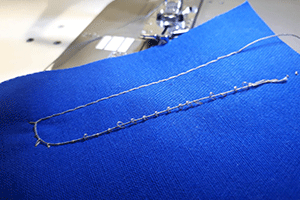
Proper tension settings are crucial for achieving smooth and even stitches with your sewing machine. Incorrect tension can cause thread bunching, uneven stitches, and fabric damage. Here's how to easily adjust sewing machine tension for optimal sewing results.
Understanding Sewing Machine Tension
Sewing machine tension refers to the balance between the upper thread and the bobbin thread. Proper tension ensures that the threads interlock smoothly within the fabric. Most sewing machines have adjustable tension settings for both the upper thread and the bobbin.
Identifying Tension Problems
Before adjusting the tension, identify the specific problem with your stitches:

Loose Stitches on Top:
Indicates too little upper thread tension or too much bobbin tension.
Loose Stitches on the Bottom:
Indicates too much upper thread tension or too little bobbin tension.
Uneven Stitches:
Can be caused by incorrect tension settings, inconsistent fabric feeding, or issues with the needle or thread.
Materials Needed
Step-by-Step Guide
Consult the Manual:
Refer to your sewing machine's manual for specific instructions on adjusting tension settings. Different machines have different mechanisms and recommendations.
Test Stitches:
Use a scrap piece of fabric to test stitches. Sew a few lines of straight stitches to observe the current tension setting.
Adjust Upper Thread Tension:
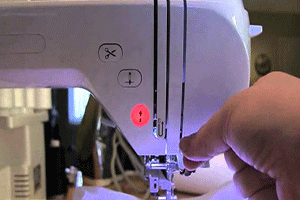
Locate the tension dial on your sewing machine. It's usually on the front or top of the machine.
Increase Tension:
Turn the dial to a higher number to tighten the upper thread tension.
Decrease Tension:
Turn the dial to a lower number to loosen the upper thread tension.
Make small adjustments and test the stitches after each change until the tension is balanced.
Adjust Bobbin Tension (if needed):
Most tension issues can be resolved by adjusting the upper thread tension. However, if necessary, you can adjust the bobbin tension.
Remove the bobbin case from the machine. Locate the small screw on the side of the bobbin case.
Increase Tension:
Turn the screw clockwise to tighten the bobbin tension.
Decrease Tension:
Turn the screw counterclockwise to loosen the bobbin tension.
Make small adjustments and test the stitches after each change.
Check and Re-Thread:
Re-thread the upper thread and the bobbin to eliminate any threading issues

Needle and Thread Compatibility:
Use the appropriate needle and thread for your fabric. Mismatched needle and thread sizes can cause tension problems. Check the needle for damage or wear and replace it if necessary.
Clean the Machine:
Regularly clean your sewing machine to remove lint and dust, which can affect tension and stitch quality. Follow the manufacturer's cleaning instructions.
Tips for Optimal Tension
Use Quality Thread:
Low-quality thread can break easily and affect tension. Use high-quality thread suitable for your fabric.
Consistent Fabric Feeding:
Ensure that the fabric feeds evenly through the machine. Uneven feeding can cause tension issues.
Practice:
Regular practice and familiarization with your machine's tension settings will help you achieve better results.
Conclusion
Adjusting sewing machine tension is a straightforward process that can significantly improve your sewing results. By understanding the basics of tension settings and following these steps, you can achieve smooth, even stitches. Regular maintenance and practice will help you master tension adjustments and enjoy a seamless sewing experience.


